Taxonomy

Perform classification tasks within the context of a defined taxonomy or hierarchy of choices.
Labeling configuration
You can approach your taxonomy definitions in several ways, including:
- User-defined labels - Use the
Choicetag to manually define your taxonomy. This is the default configuration in the template. - External taxonomy - Define your taxonomy using a JSON-formatted file or API. This option provides better performance for large scale taxonomies.
In both options, the following tags are required:
The labeling configuration must be wrapped in
Viewtags.Include the data type you are working with. The example template is classifying text, but the
Taxonomytag can also be used with audio, image, HTML, paragraphs, time series, and video.<Text name="text" value="$text"/>Use the
Taxonomytag to present the user with hierarchical options.<Taxonomy name="taxonomy" toName="text">
Taxonomy as a labeling tool
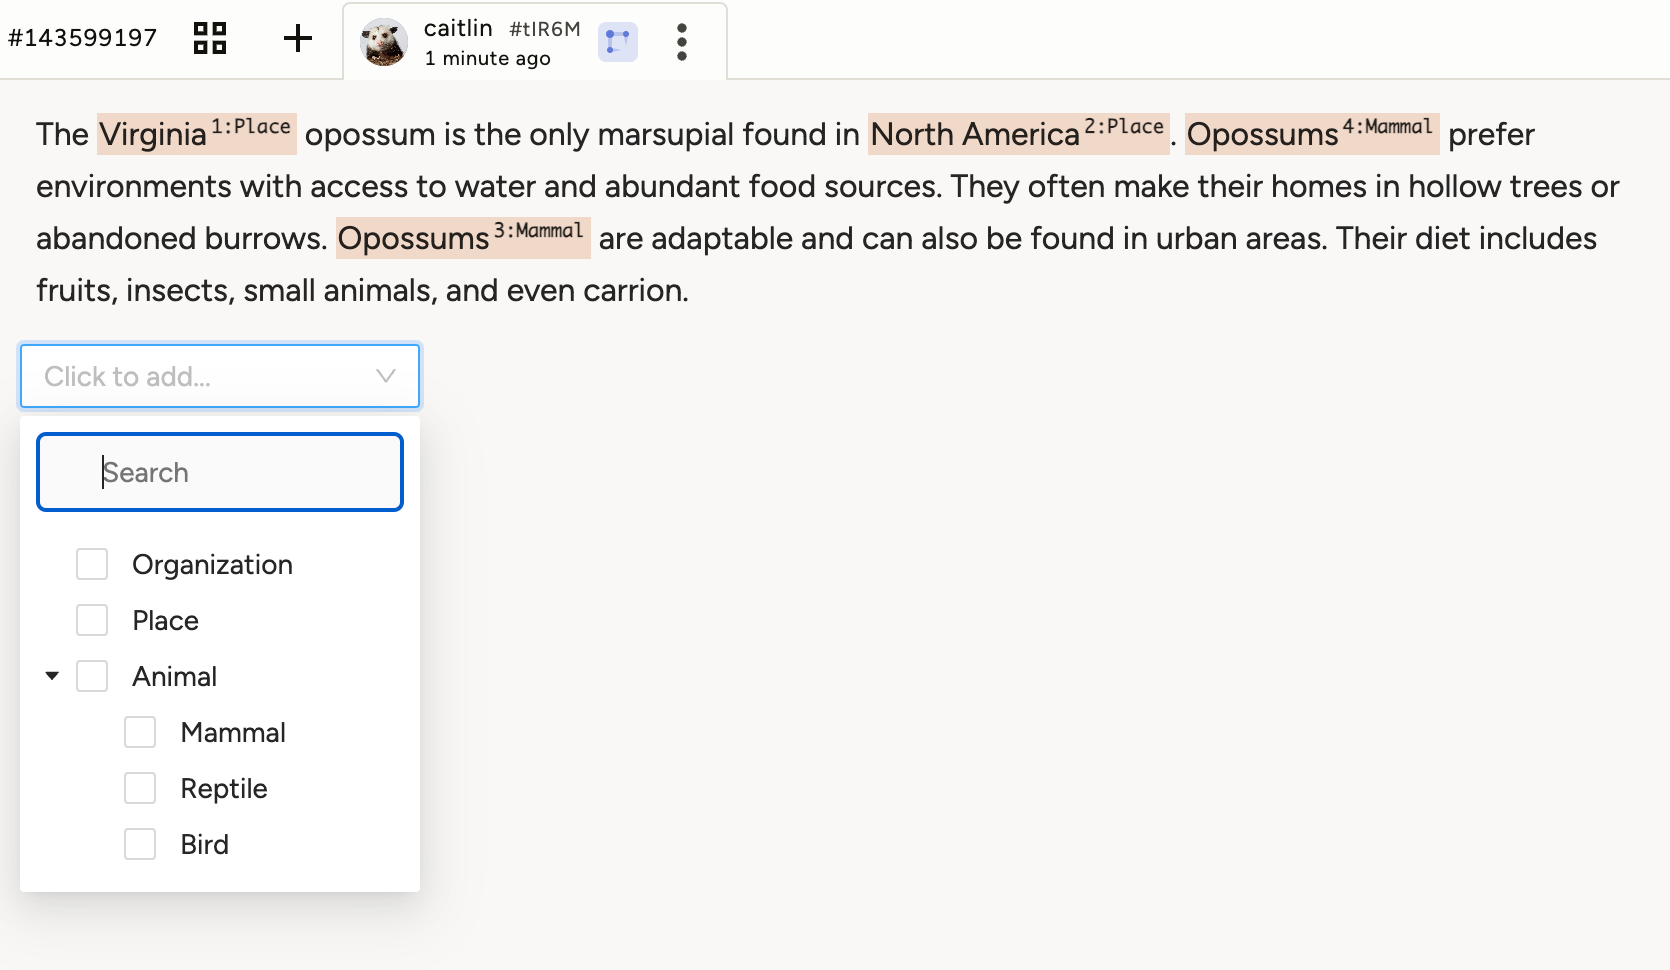
Typically, the <Taxonomy> tag is used to perform classification tasks. However, if you set labeling="true", you can apply your taxonomy choices to regions within text. This can be especially useful for NER projects.
Note that the labeling parameter is only supported when using <Text> or <HyperText> object tags.

Tip
You can use the color parameter on your taxonomy <Choice> to color-code selected regions within the text.
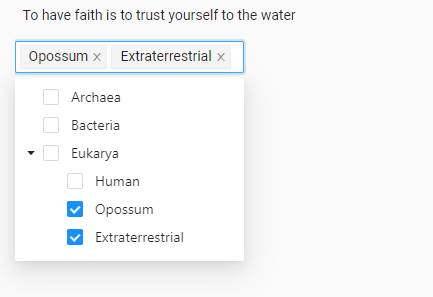
Taxonomies defined using nested Choice tags
Use the Choice tag to specify the taxonomy. Nest choices under Choice tags to create layers in the taxonomy.
<View>
  <Text name="text" value="$text"/>
  <Taxonomy name="taxonomy" toName="text">
    <Choice value="Archaea" />
    <Choice value="Bacteria" />
    <Choice value="Eukarya">
      <Choice value="Human" />
      <Choice value="Opossum" />
      <Choice value="Extraterrestrial" />
    </Choice>
  </Taxonomy>
</View>
Taxonomies defined using a remote source
You can modify the template to call an external taxonomy. There are two types of external taxonomies:
To call an external taxonomy, remove the Choice tags and specify the apiUrl parameter:
<Taxonomy name="taxonomy" toName="text" apiUrl="<YOUR_TAXONOMY_URL>" />Beta feature
The feature to call external taxonomies through apiUrl is currently in its beta phase.
For example:
<View>
  <Text name="text" value="$text"/>
  <Taxonomy name="taxonomy" toName="text" apiUrl="https://cities-nu.vercel.app/full" />
</View>
The remote taxonomy must use JSON with items in the following format:
| Property | Description |
|---|---|
items |
Required. The JSON resource should be structured as an object with the key items. See below for examples. |
value |
Required. This is what the user sees as an option to select. If you do not include an alias property, the value is exported in the annotation results. |
[alias] |
If included, the alias replaces the value property in the annotation results. The alias is not displayed in the labeling interface. This is useful when you have internal identifiers for your data. |
[children] |
Nested values within the taxonomy hierarchy. Use this when defining your taxonomy in a single JSON-formatted file. |
[isLeaf] |
Boolean value. Use this instead of children when working with an API taxonomy. The default is true. When explicitly set to false, the node is treated as a parent node. See below for more information. |
[hint] |
This string will appear as a tooltip to the user when they hover their cursor over the value. |
Securing the taxonomy
The apiUrl must be accessible to Label Studio. You can accomplish this in several ways:
The URL is public.
The URL is hosted on a local server.
The URL includes the username and password, for example
http://username:password@example.com/.While in this case the taxonomy itself is not publicly accessible, anyone with access to view the project’s labeling configuration would be able to see the credentials. Annotators would also be able to view the credentials through the Network tab in their browser’s developer tools.
The URL points to your private cloud environment. This is the most secure option. See Using cloud storage with an external taxonomy below.
Using cloud storage with an external taxonomy
Save your taxonomy in a separate bucket from your task data.
If you are unable to use a separate bucket for your taxonomy, see the workaround below.
Follow these instructions to set up cloud storage for Label Studio. This should be a separate connection from your other storage connections.
note
Do not sync this storage connection. If you do, you will need to delete the task that is automatically created when syncing the taxonomy.
When configuring your labeling interface, format your
apiUrlusing the appropriate URL format for your cloud service provider:gs://,s3://,azure-blob://.
Note on setting up cloud storage
If you perform a sync operation on a storage connection that contains your taxonomy, then the entire taxonomy will be pulled into Label Studio as a task. The result may be severely degraded Label Studio performance, depending on the size of your taxonomy. This can present a problem when you are using cloud storage synchronization to populate Label Studio tasks.
There are several workarounds for this issue:
- After syncing, simply delete the task.
- (Recommended) Establish two source storage connections and two external cloud buckets. One bucket can contain the data you need to sync for labeling tasks, and the other bucket could contain your taxonomy (which would not be synced).
- Establish two source storage connections and one external cloud bucket. Then use regex to to include/exclude the taxonomy when configuring the storage connection.
Flat file format
The basic requirements are to use JSON formatting, wrap the taxonomy structure in an items object, and include value properties for every item.
In this example, you are using children to specify child nodes. All values are loaded in a single request.
{
    "items": [
        {
            "alias": "archaea01",
            "hint": "Single-celled organisms",
            "value": "Archaea"
        },
        {
            "alias": "bacteria01",
            "hint": "Prokaryotic microorganisms",
            "value": "Bacteria"
        },
        {
            "alias": "eukarya01",
            "hint": "Basically everything else",
            "value": "Eukarya",
            "children": [
                {
                    "alias": "eukarya01_b1",
                    "value": "Human"
                },
                {
                    "alias": "eukarya01_b2",
                    "value": "Opossum"
                },
                {
                    "alias": "eukarya01_b3",
                    "value": "Extraterrestrial"
                }
            ]
        }
    ]
}
API taxonomies - Beta 🧪
When using this format, child nodes are only loaded when requested. Parent nodes are specified using "isLeaf": false and child nodes are called through the path parameter.
For example, taxonomy_api_url?path=node1 where node1 is the alias (if specified) or the value (if no alias is specified). Therefore you must ensure that your API supports the path parameter.
Taxonomy API spec
GET /?[path=value1]&[path=value2]&...&[path=valueN]
Returns a JSON object with an items key, whose associated value is a list of Taxonomy items.
If path query params are provided, return the direct children of valueN. Note that for i in range 1..N-1, value[i+1] must be a child node of value[i].
{
  "items": [ <List of taxonomy values> ]
}
Taxonomy item definition:
{

  "alias": // Optional string, short name for use in output data and path values.
  "value": // Required string, the displayed text for the taxonomy value.
           // Used same way as `alias` if alias is not specified (i.e., in output data and path values).
  "hint":  // Optional string, text displayed when user hovers over taxonomy item.
  "isLeaf": // Required boolean with default=false. Indicates whether this node has more children.
}
See the following taxonomy (https://cities-nu.vercel.app/labels2) for an example:
{
    "items": [
        {
            "alias": "AF",
            "value": "Africa",
            "hint": "AF",
            "isLeaf": false
        },
        {
            "alias": "AN",
            "value": "Antarctica",
            "hint": "AN",
            "isLeaf": false
        },
        {
            "alias": "AS",
            "value": "Asia",
            "hint": "AS",
            "isLeaf": false
        },
        {
            "alias": "EU",
            "value": "Europe",
            "hint": "EU",
            "isLeaf": false
        },
        {
            "alias": "NA",
            "value": "North America",
            "hint": "NA",
            "isLeaf": false
        },
        {
            "alias": "OC",
            "value": "Oceania",
            "hint": "OC",
            "isLeaf": false
        },
        {
            "alias": "SA",
            "value": "South America",
            "hint": "SA",
            "isLeaf": false
        }
    ]
}
When the user expands the “Africa” option, the following request is sent to retrieve the child values: https://cities-nu.vercel.app/labels2?path=AF